Showing posts with label Nails. Show all posts

Wednesday, January 18, 2017

Born Pretty Holo Laser Powder-Silver

Press Sample


Hello again!

Do you love a holo look? I know I do!

Today I swatched one of Born Pretty's holographic powder. This is the second one that I swatch from them but the first to put on my blog. 

So I picked a silver powder. It is item number 33368 in #1.

Born Pretty Store Holographic Laser Powder item #33368 (#1)


I gotta tell you that for the price and the wait (it comes from overseas so you have to wait a bit longer to get) it is so worth it. Right now, it is on sale for $1.99 compared to other competitors. The price is awesome. It does require you to use a gel base (unless you find a way around that) in order for the powder to adhere. It's very holo, and thats just indoors. It went on easy and it did not smear/smudge after putting on top coat, also gel.

Born Pretty Store Holographic Laser Powder item #33368 (#1)

Born Pretty Store Holographic Laser Powder item #33368 (#1)


I started off with a black gel base. I cured it but did not remove the sticky layer on the base. The sticky layer is what helps the powder adhere to my color. The powder does come with a small makeup sponge in which I dipped to grab some of that holo goodness and then just started rubbing it on my nail. It doesn't take a lot of effort to get it onto the nail.

Born Pretty Store Holographic Laser Powder item #33368 (#1)


The first time that I used this powder, I was kind of scared that I would mess it up somehow. But I was so surprised to see how easy this was. It is kind of messy, so I did apply a latex barrier, Sexy Cuticles liquid nail tape by MDJ Creations (I will add the link at the bottom). Once my latex was dry then I started applying the powder. 

All in all, I love Born Pretty's holographic powder. They are priced great and they have a big selection of powder types and colors. By this time you must have seen my IG video tutorial for this powder. But, if you haven't, I am giving away one of these! Why? Well, a little back story... So, Born Pretty had asked me if I was interested in reviewing some items, I said yes of course and I made my pick. I picked this powder without realizing that I already had one on the way from them.. oops! my bad! but your win... could be! So, I am sure I have posted the giveaway info by now. And because you were so kind to stop by my blog and read all this, you are entitled to an extra entry! But shhh... Don't tell anyone one else! If someone stops by my blog they will see that they can also get an additional entry. If they don't, well, that's a higher chance you get at winning. ;-) Just read the instructions on my giveaway post and do the same thing twice! See IG post for giveaway instructions. 

Thank you for stopping by and see you on instagram! Don't forget to follow my IG page!

                        https://www.instagram.com/nails_by_xoch/?hl=en

Direct link to the holographic powder, item #33368 in #1: Use code XVSW10 to get 10% off!

http://www.bornprettystore.com/1gbox-holographic-laser-powder-manicure-nail-glitter-powder-colors-p-33368.html

Link to MDJ Creations (at the moment it seems like Melissa does not have the liquid latex in stock, but she does have other gorgeous nail polishes and more!):

https://www.etsy.com/shop/MDJCreations?ref=condensed_trust_header_title_items

Thursday, May 29, 2014

Funky Fingers!!


So I came across 4 pretty polishes on a run to Five Below. For those of you that don't know, Five Below is a cool store that sells a lot of cool things that cost $5.00 and under! They have from cosmetics, to cell phone cases and more. From what I have heard, there are not that many locations spread out through the states. I know there's a lot in Virginia, since that's where I first came across one. Now I'm in PA and I'm glad I'm able to find them here because they have cool polishes for great prices!

These polishes are called Funky Fingers! They usually sell them for 3 for $5.00. I think that's a great deal! They also sell a brand called Fresh Paint for the same price. 

If you're lucky like me, you'll find Funky Fingers for $1.00!! each that is! I bought 5! They only had 4 colors, but I ended up getting an extra for my sister. I'm only reviewing 3 because i added one to my previous giveaway. 

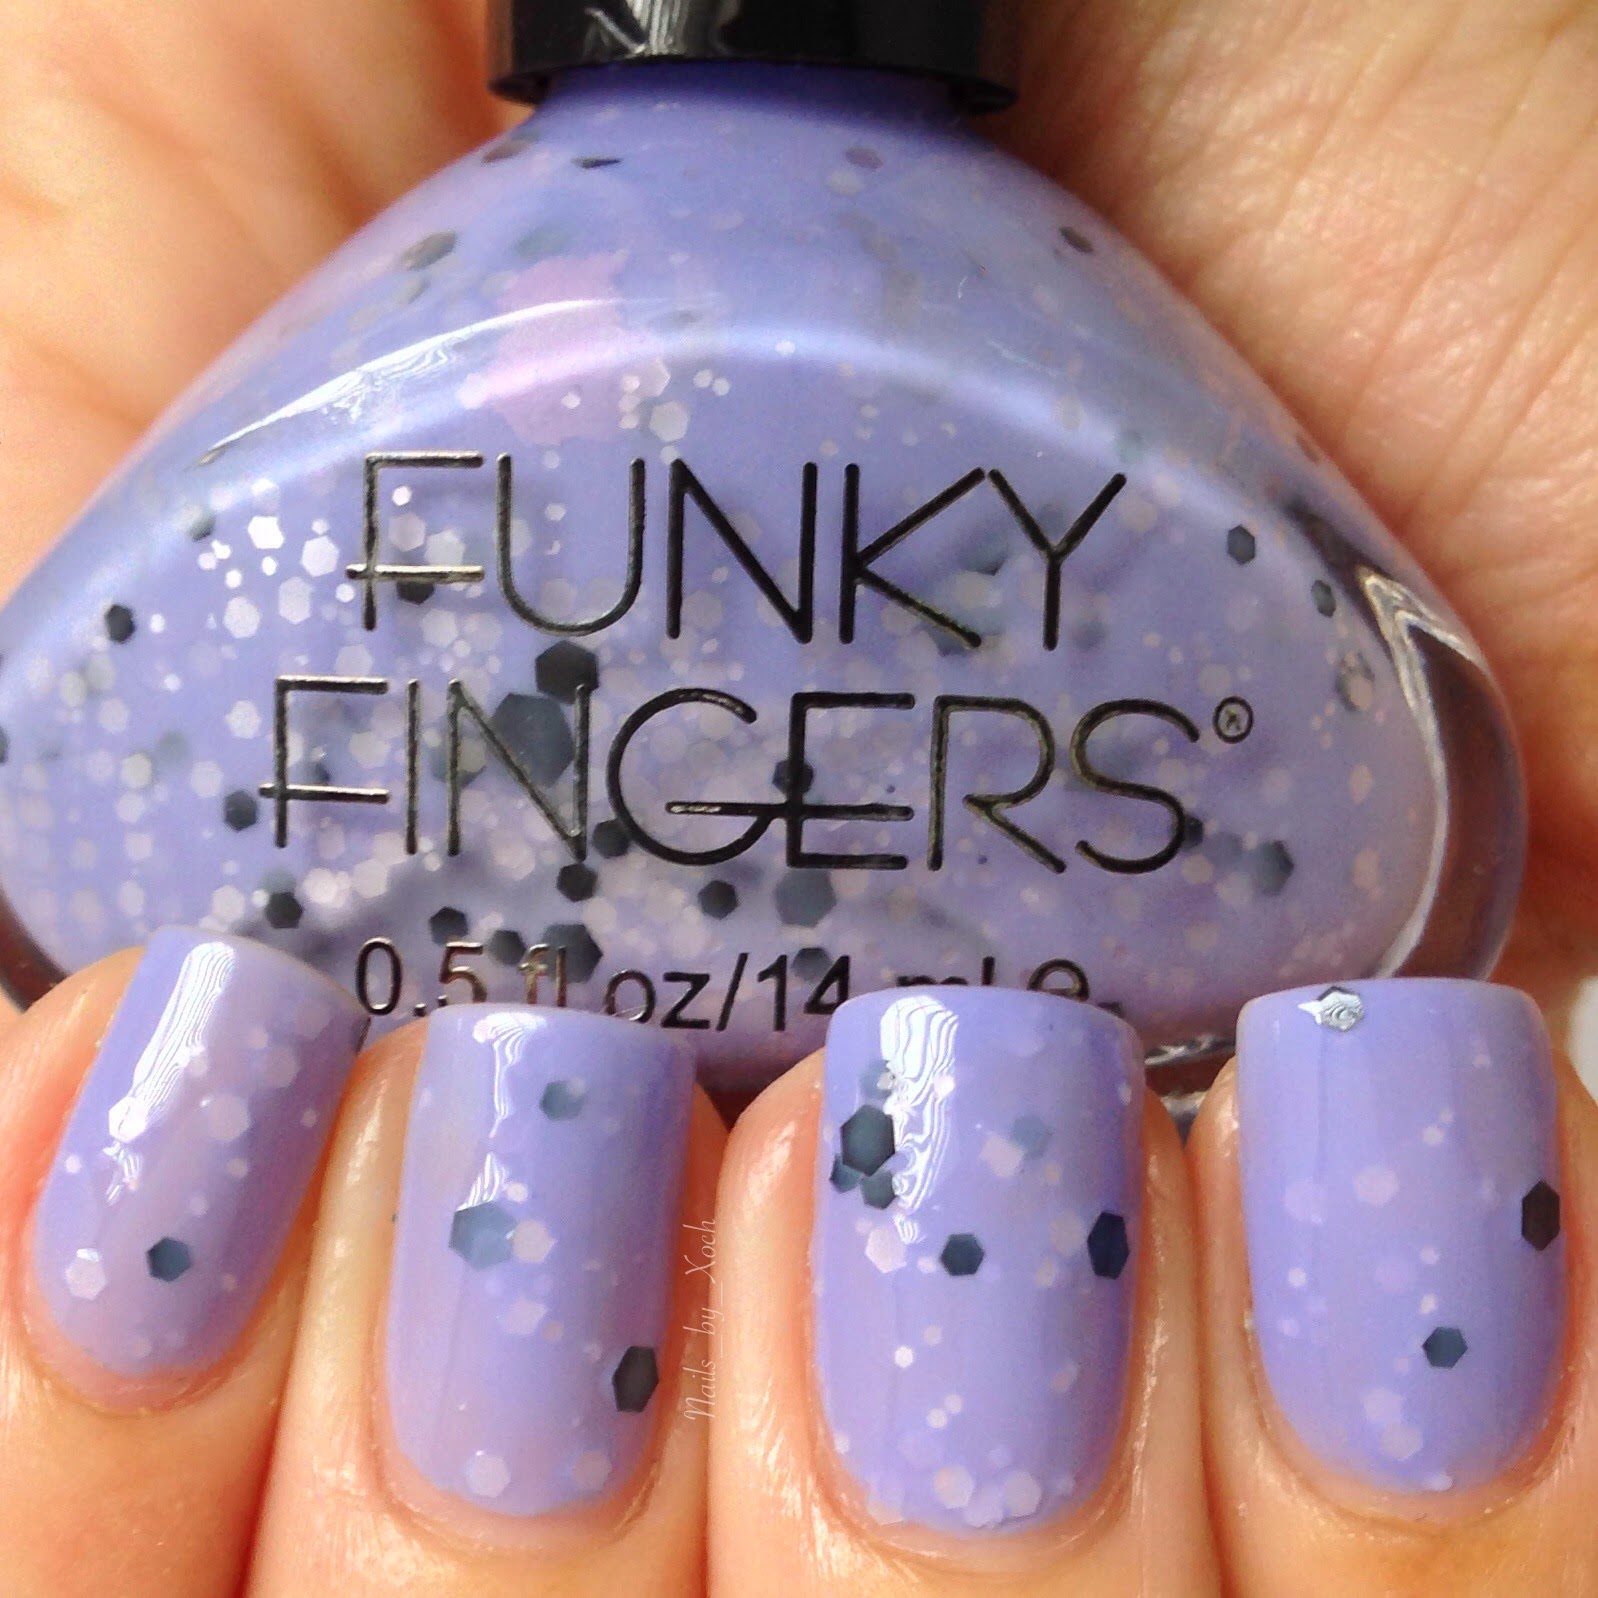
Funky Finger Nail Polish
The 4th one was of the same kind but in a light blue. I have to say, these remind me of indie nail polish. There's another polish I have of Funky Fingers that also reminds me of indies... Makes me think... are these store brands trying to copy indies?? lol

Any way, the names for these are (from left to right) Berried Treasure, Mint Choco-Chip and Fro Yo!. I love the name of the purple one! lol.

Funky Finger Nail Polish
So, I like the formula of these polishes. I would of loved it if it were just a tad bit thicker. Just a little hint. I love the fact that you don't have to pull out your fishing rod on these! No fishing! I would recommend putting them upside down while you prep your nails though. There are bigger glitter in there that like to sink just a little bit, but I didn't have so much problem with it because I had it upside down for a bit. I would say give it 5 minutes at least. It brings small and large black hex glitter, a semi clear and white hex glitter. The base is a milky color so it's perfect!

I started off with the pink one, Berried Treasure. I have to say, this is my favorite from these 3. I did two coats and I was happy with how it looked! Like I said, no fishing needed for this one. I will have to say that you might do some fishing if your glitter sinks... so if that's the case, give it a good shake from all sides and then leave it upside down for a bit. I love this color pink. It is not bright or too pale. Its just perfect. And I love how it looks with my skin tone.

Funky Fingers: Berried Treasure

Funky Fingers: Berried Treasure

Up next we have Mint Choco-Chip. This was the least favorite from the 3. The color is pretty, I give it that. I had to use 3 coats on this one because the brush was a little crappy so it was streaking the polish. So to make it all smooth and pretty, 3 coats had to be used.... Same formula as Berried Treasure which is good. I guess there's not much more to say about this one, only that if you find it, open the bottle and make sure the brush looks good... LOL

Funky Fingers: Mint Choco-Chip

Funky Fingers: Mint Choco-Chip

My second favorite, Fro Yo!. I not only love the color, but how cool is that name!? Makes me want to say it aloud! LOL... I love this pale purple color. I used 2 coats and I love how it looks! Purple is one of my top 3 favorite colors so this is perfect! The brush on this one was great so I didn't have any problems applying this polish. it was smooth and no fishing.

Funky Fingers: Fro Yo!

Funky Fingers: Fro Yo!

Over all, I love these polishes. I love the combination of black and white with these milky colored polishes. They don't sparkle but that's alright with me. When I bought these they were on sale and they looked funky... The polish had separated, but I gave it a rough shake and it looks good now. 

Xochilt


Friday, May 23, 2014

Sharpie Neon Design


So the other day I bought these really cool neon sharpies! I don't really use sharpies that much, but I thought these were cool for some nail art! I got these at K-Mart.


They come in a pack of 4 which brings neon green, pink, orange and yellow. The colors are great! They are also fine point markers so that's a plus!

Now, I decided to create a design on my nails. The ideas were endless which made it more difficult for me to choose one... So I came up with this:


I love how the colors pop with the white. I've prepared a little tutorial on how to do these so here it is:

You will need a white base, or maybe even black. I used Snow Me White by Sinful Colors Professional. I applied two coats and sealed it with my HK Girl top coat by Glisten And Glow.

After your top coat is dry, start creating the designs. You can start with any color you like. I started with the neon yellow, followed by the pink, green and finally orange.


After I was done with my designs, which I decided to do on my ring, middle and pointer fingers, I added tiny dots on my pinky and thumb using all colors. 

Now, once you're done doing designs on your nails, the next logical step would be to seal it with your favorite top coat. But, since we are using sharpies, using a top coat will melt the color and it will make it look faded. Trust me, I tried! Lol

Here's a picture to show you the difference between top coat vs no top coat. Wonder if you can tell which one is which!
See?

Now time for a video tutorial! 


I hope you guys like this look. I'm not in love with it, but it still looks cool under the black light! Maybe I'll try doing a different design sometime. :-) 

Thanks for stopping by and don't forget I have a giveaway going on which ends tomorrow Saturday 24th at 5pm EST. 


Wednesday, April 23, 2014

#RoarForAutismAwareness

Hello Ladies!

So the lovely Amber, @amcpolish, hosted a special cause. This cause was about creating Autism Awareness by doing a nail collaboration!

Now, I don't have anyone in my family with autism, but you don't have to to spread the word about it.

I decided to join in because I believe this is a great way to spread the word.

So, what we had to do was to create a blue mani with animal prints in it! I created a simple blue mani. I love how it turned out. I didn't want to take it off after two days (that's how long my mani last.. usually) but, since I couldn't post it just yet, I had to change it up so I can post something to my Instagram. LOL

So, without further ado, here is the finished collage Amber created!


There were many ladies involved in it, so if you would like to check out their solo shots, just search for the hashtag #roarforautismawareness! =) 

I think the collage came out great! I love how it all came together and how all these ladies tool the time to be a part of it. All these manis are gorgeous! It was fun creating this mani too! 

Here is my solo shot!


I love it!!!


Sky shot!


I don't know why but I love this shot! LOL

It's Macro Time!!!


Look at those holo glitter!!!

Now, for the names of the polishes I used for this mani:

Sinful Colors Professional- Snow Me White
China Glaze- Frost Bite
China Glaze- Fairy Dust
Color Mates- Stormy Weather


So, to close this, I will say that if you get the opportunity to join a great cause, do it! You won't regret it! I promise!

I'll be posting a quick video of how the mani looks with Fairy Dust on instagram, so stop by and check it out! ~~~> @Nails_by_Xoch

Thank you ladies for taking the time to check out my blog! Don't forget that I'll be hosting a giveaway when I reach 500 Followers, so if you're still not following, go check out my page! =)))

Until next mani!


Thursday, April 17, 2014

My Honey & My Mani

Hi Ladies!!

It has been a couple of days since I've been here!

Well, last night I posted a video (on IG) of my husband doing my mani. Yup, he did my mani.... or at least tried... he just did one hand. Thank God! LOL! That was something. I told him to pick a color and he picked his favorite, which is green... Forest green...

The idea was fun, but oh boy! what a mess... The color that he picked stained my nails and he put so much that it got under my nail...

Let me share with you the video. I sped up the video a bit but not as much as the one on IG, and the quality should be much better.


Here it is! The video would of been 3 minutes long because he took like 20 plus seconds on each nail!!

And this is the end results! What do you think?
You think he earned a tip or should i fire him?? LOL

I saw FIRE HIM! LOL... although it was fun watching his face as he worked, 
I would not let him do it again! LOL.. I'll just stick to my regular routine!

Well, I hope that you ladies enjoyed this as much as I did. I would love to see you all try to do this with your Honey. Don't forget to share with us ladies divas so we can also have a laugh... Check out my Instagram here so you can check out the original post of this adventure and so you can share the main post with all the ladies on your instagram so they can too do this! I look forward to seeing your Honey & Mani!

See ya next mani!

Xochilt.


Friday, April 11, 2014

Primrose by Sincerely Polish

Hello lovely ladies!

So, yesterday I posted some pretty pictures of a lovely yellow on my Instagram!

This pretty yellow is called Primrose and it is from the Garden of Eden Collection by the lovely Karen, Sincerely Polish!

Primrose in a mini bottle

Primrose is a gorgeous soft pale yellow crelly with shimmer from rainbow shifting hexes. It is perfect for this time of year, where the flowers are blooming and the days are getting nice and warm. This yellow captures Spring perfectly. It will go nicely with any design you decide to add to it because it's so soft that it will not over power your design, but yet it makes a statement. I paired my Primrose mani with the others colors from this collection. (If you look at my previous post on Garden of Eden, you will be able to see the other beautiful colors Karen has created). On my ring finger, I just dabbed a little bit of each color by just using the brush of each polish, then I topped it with my favorite top coat and voila!

I have to admit, I wasn't a big fan of wearing yellow before because I had purchased two others from different stores (drug stores) and I never really liked the way they looked with my skin (even though yellow is one of my favs colors!). But after trying this one and swatching it for Karen, I fell in love. The fact that the color is not dramatic makes me love it even more. I also love that its pale and yet it has shimmer to it. And the best part, it goes perfect with my skin color! 


Wish I had sun so you can see the shimmer in it!


Look what i found while taking my pictures!! a little cotton tail bunny!

Besides adding all the other colors to my ring finger, I also did some glitter placement in a 'V' shape.

Now, let me show you those macro shots!! ;-)


Can you see the shimmery shifting rainbow hexes!?? Just Gorgeous!


The other colors have the shifting rainbow hexes as well! But since the sun was already setting, I wasn't able to catch them in action.... :-( But on the bright side, look at all those other colors! aren't they prettyy!!? I used a white polish as an undie to make those color POP! 


And here's another bottle shot inside an egg! Doesn't it scream Easter??? LOL


I love to get creative when taking pictures because that's another thing I love besides doing my nails and collecting polishes, photography!

So, What do I give this color???? I give it 5 STARS!!!! (that's from 1-5, 5 being the highest!)

So, If your're looking for this perfect yellow, you HAVE to get it!! I guaranteed you that you won't be disappointed! Just visit Karen's shop and browse through all her other colors she has. She has gorgeous colors! At the moment her store is closed because she is working on restocking, but she will be back on April 27th, so mark your calendar and don't forget to follow her for more updates!

One more thing that I HAVE to mention about her polishes... maybe two, or we'll see how many....
One, they dry fast! so that's a plus since I'm always doing my nails at night. Second, I have wet my hands today so many times, from taking a shower, to doing lots of dishes and even bathing both my dogs,and  my polish still looks GREAT!!!! 

So, go on! get yours! these polishes are also available in full size!

Thanks again, ladies!

Until next mani!

Xochilt.


Saturday, April 5, 2014

Garden of Eden by Sincerely Polish


Hi Ladies! 

Today I want to talk about an indie polish that I absolutely love! It is by the amazing Sincerely Polish
It is a collection of five polishes. Beautiful colors. 

Spring is here and those colors are just too perfect! They are easy to apply and to get a beautiful look all you need is two coats! The colors are soft and they have shimmer in them. Its hard to capture the shimmer on camera, but if you look closely, you're able to see something. =) 

Now, to say I have a favorite from that collection is to be lying. I love them all and it's just not fair to pick one as my favorite. They're all beautiful that I wish I had enough fingers so I can wear them all together. Maybe I can come up with a mani where i'm able to use them all! 

So, now let me introduce you to the complete collection!


Here we have: BlueStar, SweetPea, Primrose, Petunia, and Shellflower.

Very soft and lovely colors. One thing I love about this collection is that two coats is enough to make the color stand out. Did I mention that this collection (and all other polishes SincerelyPolish  makes) is 5-free! That means that it does not contain Toluene, Dibutyl Phthalate (DBP), Formaldehyde, Formaldehyde Resin or Camphor. All that means is that they are free of toxins, which is GREAT!

Here are the individual pictures in a collage. I love taking pictures so I went a little crazy taking pictures of this collection! I have more pictures but I just didn't want to spam this page with pictures. lol

And here are the SWATCHES!!!!!!
Remember that I used two coats for each. =)

This is Bluestar! Isn't it pretty!! Reminds me so much of the nice blue sky.

This gorgeous is Petunia! Look at that shimmer! Can you tell its there??

This beautiful yellow is Primrose. I have worn two other yellow polishes that I own and this is definitely my favorite yellow! I love how its so soft!

This gorgeous minty color is Shellflower. Stunning! what more can you say about this color? It reminds me of the Tiffany color. Just classy!

Last polish of this collection is SweetPea! I. Love. This. Color! It's a perfect light pink! I just love how its soft and shimmery!

So what do you think of this collection so far? I absolutely, with no doubt, love it! If you haven't already, follow Sincerely Polish on Instagram by clicking here. If you would like to check out her shop, click here. She has other beautiful polishes that you will adore. Check out her pictures, follow, like and shop!

If you do get this collection, don't forget to tag her and hashtag "sincerelypolish" so that we all can see your wonderful manis!

I give this collection 5 stars out of 5! Just perfect!

Thank you ladies!

See you next mani!

Xochilt.


Friday, April 4, 2014

Pink and stamp!

Hi ladies!

So today I felt like doing some stamping on my nails. Initially, I was just going to do an accent finger, but then I decided that it would look nice if I stamped every nail!


This is my base. It's called "It's Chiff-on!" by Sally Hansen. 

I love this color! It's sort of like a peachy pink. But what I love about it is the fact that there are tiny gold flakes in it!! I wish I thought about taking a macro shot before I decided to start stamping. I guess I was too excited to even think about it! Lol.

I used the Konad stamper and scraper, which I love! The plate is from Shany Cosmetics and the number is SH18. The polish is "Golden-I" by Sally Hansen.


Both by Sally Hansen. 


Here's a macro of the stamper with the design. Isn't it pretty??!


Here's the final look. 


Macro!!!


I really love how this look came out. Gold and this peachy pink came together like bread and butter! I don't do a lot of stamping and I have no idea why! The ideas are endless. Maybe I should start doing some more :-). I hope you ladies like the final look

Until next mani!

Xochilt